Are you eager to try your hand at simple nail art designs but don’t know where to begin? Whether you’re searching for an affordable alternative to professional manicures or just want to experiment with fun and creative nail designs at home, you’re in the right place. This guide will walk you through easy-to-follow tutorials that anyone can master, regardless of skill level, using tools you already have at home.
Nail art doesn’t have to be difficult or time-consuming. With basic items like bobby pins, tape, and a little patience, you can create stunning simple nail art designs that look polished and professional. From classic French tips to bold dotted patterns, the possibilities are endless. Let’s dive into the world of nail art and bring out your inner artist!
Why Simple Nail Art Designs Are Perfect for Beginners
If you’re new to nail art, starting with simple nail art designs is the best way to boost your confidence and improve your skills. These designs are ideal because they require minimal tools, are easy to learn, and allow you to experiment with creativity without feeling overwhelmed.
Here’s why simple nail art designs are a great option for beginners:
- Accessibility: You don’t need to invest in professional nail art tools or visit a salon to achieve beautiful designs. Most simple nail art designs can be done with common household items.
- Flexibility: These designs can be customized to suit various occasions, personal styles, and colour preferences. You can choose bold or subtle colours, mix and match designs, and adapt them to your mood or outfit.
- Low Pressure: Because they are easy to correct, simple nail art designs are forgiving. If you make a mistake, it’s easy to wipe away or adjust before it dries, allowing you to practice without frustration.
- Quick Results: Many of these designs take only a few minutes to complete, making them a convenient way to enhance your look without spending hours on your nails.
By starting with these easy designs, you can gradually work your way up to more advanced nail art techniques while enjoying the process.
Essential Tools for DIY Simple Nail Art Designs
You don’t need an arsenal of expensive equipment to create beautiful nails. In fact, some of the best simple nail art designs can be achieved with just a few basic tools that you probably already have at home. These tools are essential for creating clean, precise designs and ensuring your manicure lasts longer:
- Bobby Pin: A fantastic tool for creating dots or small, detailed designs. The rounded tip of a bobby pin makes it easy to dip into nail polish and apply to your nails.
- Scotch Tape: Ideal for making straight lines or geometric patterns. You can use tape to block off sections of your nails, allowing for clean and crisp designs.
- Toothpick: Perfect for fine detailing, drawing lines, or creating intricate patterns. Toothpicks can also be used to fix small mistakes or sharpen the edges of your design.
- Nail Polish: Choose a variety of colours that match your personal style. For a beginner, it’s good to have at least two or three colours, along with a clear top coat to seal your design.
With just these simple tools, you can create a wide variety of simple nail art designs that are both fun and professional-looking.
Step-by-Step Guide to 5 Simple Nail Art Designs
Now that you have your tools, it’s time to create your own simple nail art designs. These five beginner-friendly designs will help you develop your skills while having fun.
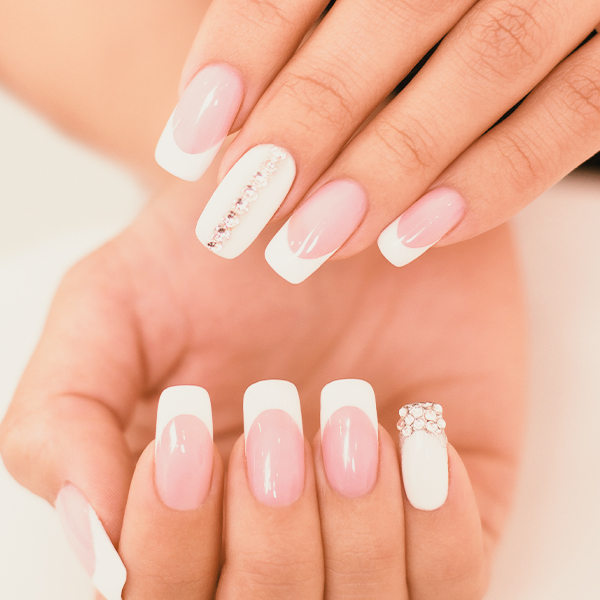
1. French Manicure
The French manicure is a timeless, chic design that never goes out of style. It’s also one of the easiest simple nail art designs to perfect at home.
- Step 1: Apply a base coat to protect your nails and let it dry.
- Step 2: Use a piece of tape to cover the lower part of your nail, leaving the tip exposed.
- Step 3: Paint the tip of your nail with white polish. Remove the tape and allow the polish to dry.
- Step 4: Finish with a clear top coat to add shine and protect your manicure.
2. Dotted Nails
Polka dots are a playful and stylish design that is easy to achieve, even for beginners. The dotted design is one of the most versatile simple nail art designs.
- Step 1: Paint your nails with a solid base colour, such as white or pastel pink.
- Step 2: Dip the end of a bobby pin or toothpick into a contrasting nail polish colour, such as black or blue.
- Step 3: Gently dab the bobby pin onto your nails to create evenly spaced dots. You can create a pattern or place them randomly for a more whimsical look.
- Step 4: Seal your design with a top coat to ensure the dots stay intact.
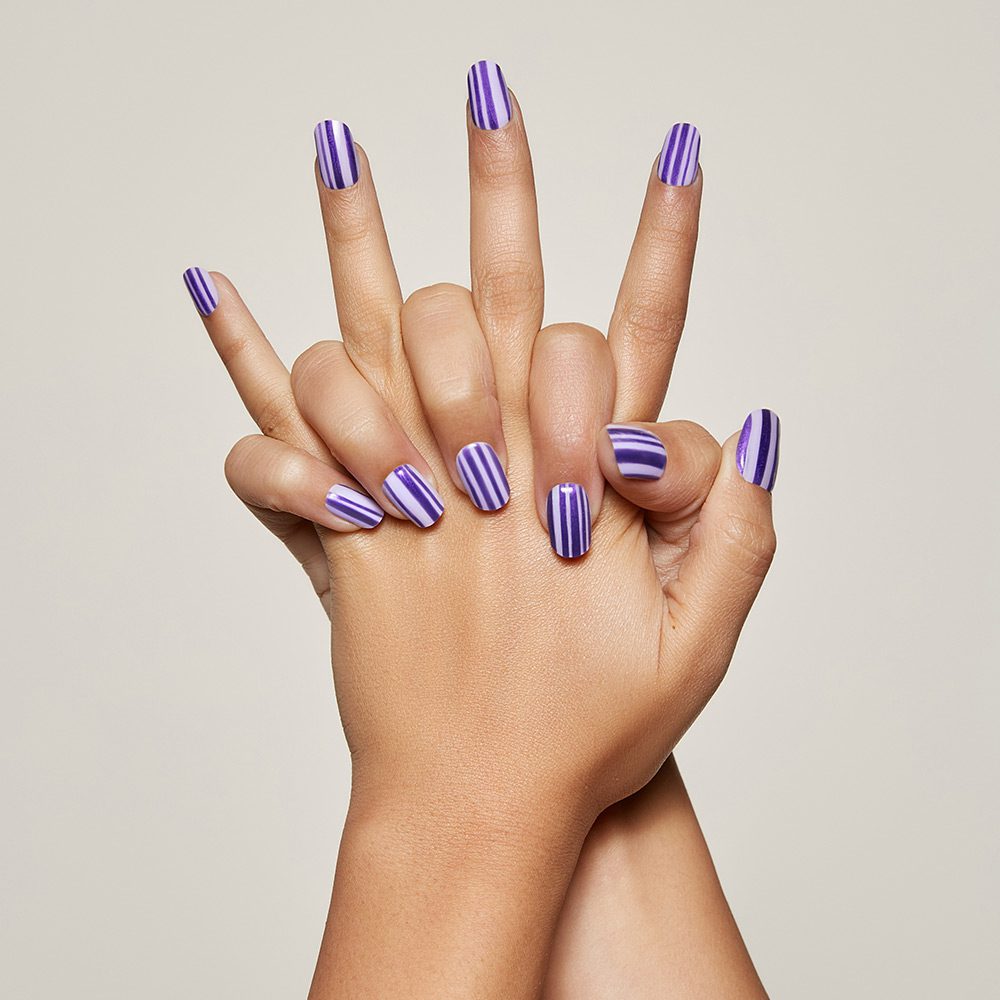
3. Striped Nail Design
Stripes can add a modern edge to your nails, and they’re incredibly easy to create with scotch tape.
- Step 1: Apply a base coat of nail polish, such as a light pink or nude color.
- Step 2: Once the polish is dry, apply thin strips of tape horizontally or vertically across your nails.
- Step 3: Paint over the tape with a contrasting colour. Carefully remove the tape before the polish dries.
- Step 4: Apply a top coat to protect your design and give your nails a glossy finish.
4. Floral Nail Art
Flowers can add a cute and feminine touch to your nails. This design is perfect for spring or summer and is one of the easiest simple nail art designs to execute.
- Step 1: Paint your nails with a soft background colour like baby blue or light pink.
- Step 2: Using a bobby pin or a dotting tool, create small clusters of dots to form flower petals.
- Step 3: Add a dot of a contrasting colour in the center of each flower.
- Step 4: Seal the design with a top coat for added durability.
5. Glitter Accent Nails
If you want to add a little sparkle to your look, glitter accent nails are a great option. This design adds an extra pop to an otherwise simple look.
- Step 1: Paint your nails with a solid colour, such as red or black.
- Step 2: On one or two accent nails, apply a glitter nail polish. You can use a glitter top coat or a polish with embedded sparkles.
- Step 3: Finish with a clear top coat on all nails to ensure the glitter stays in place and your design lasts longer.
Best Nail Art Designs for Different Occasions
Your simple nail art designs can be customized to fit any occasion, from casual get-togethers to more formal events. Here are some ideas on how to tailor your designs for different settings:
- For the Workplace: Opt for understated, neutral designs like a French manicure or soft pastels with minimal dots.
- For a Weekend Brunch: Brighten up your nails with playful floral patterns or colorful stripes.
- For a Night Out: Add some bling with glitter accent nails or bold, geometric patterns to make a statement.
By mixing and matching designs, you can create nail art that perfectly complements your outfit and the occasion.
Tips for Long-Lasting Simple Nail Art Designs
Want to make sure your simple nail art designs last as long as possible? Follow these tips to keep your nails looking fresh and beautiful:
- Use a base coat: Always start with a base coat to protect your natural nails from staining and to help the polish adhere better.
- Apply thin layers: Thick layers of polish are more likely to chip. Apply multiple thin layers and let each coat dry in between.
- Finish with a top coat: A clear top coat adds shine and helps seal your design, making it last longer.
- Reapply top coat every few days: This will refresh the shine and give your design extra protection from chipping.
When to Seek Professional Help for Intricate Nail Art
While simple nail art designs are perfect for DIY at home, sometimes it’s worth treating yourself to a professional manicure, especially for more intricate or time-consuming designs. If you’re looking for something a bit more polished or want to try out advanced techniques, consider booking an appointment at Tips and Toes. Their expert team can help you achieve flawless designs with the latest trends in nail art.
Conclusion: Get Creative with Simple Nail Art Designs
With just a few basic tools and a little creativity, you can master the art of simple nail art designs from the comfort of your own home. Whether you prefer minimalistic designs or something a bit more bold, there’s a tutorial here for everyone. When you’re ready for more intricate designs or just want to be pampered, consider visiting Tips and Toes for professional nail care and expert nail art. You’ll be amazed at how fun and easy nail art can be! Visit their website today to book an appointment and transform your nails!
Note: Read Our Latest Blogs:
Brazilian Protein Hair Treatment | Protein Treatment for Hair Side Effects | Foot Massage Benefits | Protein Treatment for Hair in Salon | Protein Treatment for Hair Benefits | Types of Eyelash Extensions
Frequently Asked Questions
Q1. What tools do I need for simple nail art designs?
A bobby pin, toothpick, tape, and a variety of nail polishes will do the trick.
Q2. How long do simple nail art designs last?
With proper application and a good top coat, your designs can last up to a week without chipping.
Q3. Can I mix multiple designs on one hand?
Yes, mixing different designs on each nail is a fun way to express your creativity.
Q4. What if I make a mistake while doing nail art?
You can easily wipe away mistakes with a cotton swab dipped in polish remover before it dries.
Q5. Are simple nail art designs suitable for short nails?
Absolutely! Designs like dots and stripes look great on nails of any length.
Q6. How often should I redo my nail art?
You can touch it up every 5-7 days or whenever you notice chipping.
Q7. Can I do nail art on natural nails?
Yes, simple nail art designs work perfectly on natural nails without requiring acrylic or gel.
Q8. What colours work best for beginners?
Start with neutral or pastel colours for base coats and add pops of bright colours for designs.
 KSA
KSA
